donderdag 27 februari 2014

mini album stippen en strepen / mini album dots and stripes (11)

Pagina 5 bestaat weer uit een dubbele pagina met opbergvak en een flap aan de linker zijde. Aan de binnenkant van de flap is nog een extra flap gemaakt die naar boven slaat en waaronder ook nog foto's of kaarten geplakt kunnen worden. In het opbergvak aan de achterkant van de pagina zit nog een insteekvel voor extra foto's.

Page 5 contains a pocket and a flap at the left side. At the inside of the flap I made another flap that goes up. That way there are 2 extra pages for more pictures or postcards. In the pocket at the back is a tag for extra pictures. 


woensdag 26 februari 2014

mini album stippen en strepen / mini album dots and stripes (10)

De vierde pagina bestaat weer uit een aantal enveloppen die op verschillende manieren gerangschikt zijn. Ik heb er wel voor gezorgd dat de opening van de enveloppe aan de rechterkant zit. Ook voor deze enveloppen heb ik een insteek vel gemaakt waarop nog weer extra foto's of kaarten geplakt kunnen worden. Door de enveloppen zowel horizontaal als verticaal te gebruiken ziet de pagina er spannend uit.

The 4th page is made of envelops again. I used 4 envelops this time and placed them horizontal and vertical. By doing so the page looks more interesting. All envelops are open at the right side and I made some extra tags for the envelops. On the tags is extra space for pictures or postcards.


dinsdag 25 februari 2014

mini album stippen en strepen / mini album dots and stripes (9)

De derde pagina heb ik voorlopig erg simpel gehouden. Ik heb nog geen idee hoeveel papier ik nog nodig heb dus ik doe even wat zuiniger aan. De meeste extra vakjes kunnen ook nog wel toegevoegd worden als de basis pagina's al klaar zijn. De derde pagina bestaat uit een opbergvak met een extra flap aan de linkerkant. In het opbergvak deze keer een grote extra pagina voor meerdere foto's.

I kept the third page very simple. I don't now yet how many sheets of design paper I will need to compleet the album. If there are sheets left at the end I can easely make some extra's for the album if I want to. The third page is a pocket page with a flag on the left side. For the pocket I made a large tag for some extra pictures or cards.


maandag 24 februari 2014

mini album stippen en strepen / mini album dots and stripes (8)

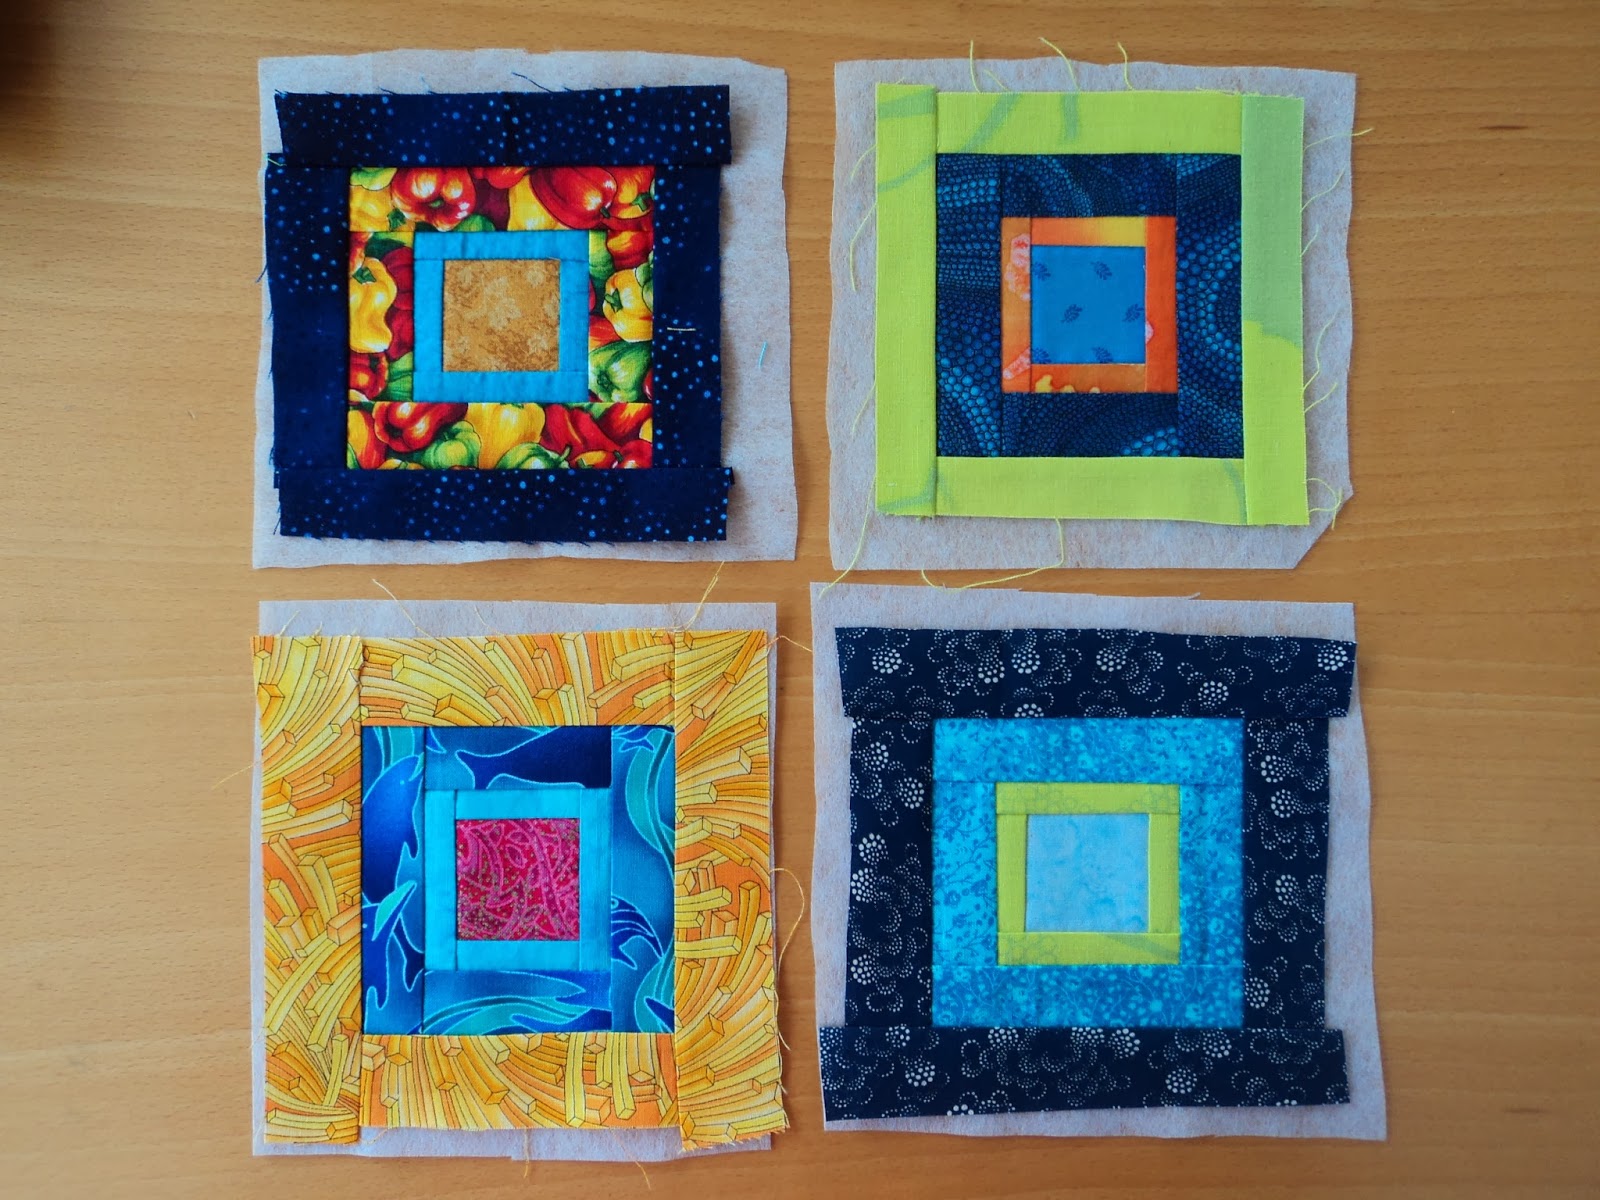
Vandaag was ik weer even terug bij mijn mini album. De eerste 2 foto's zijn van de achterkant van de eerste pagina.

Today I worked on the mini album again. The pictures 1 and 2 are from the backside of the first page.


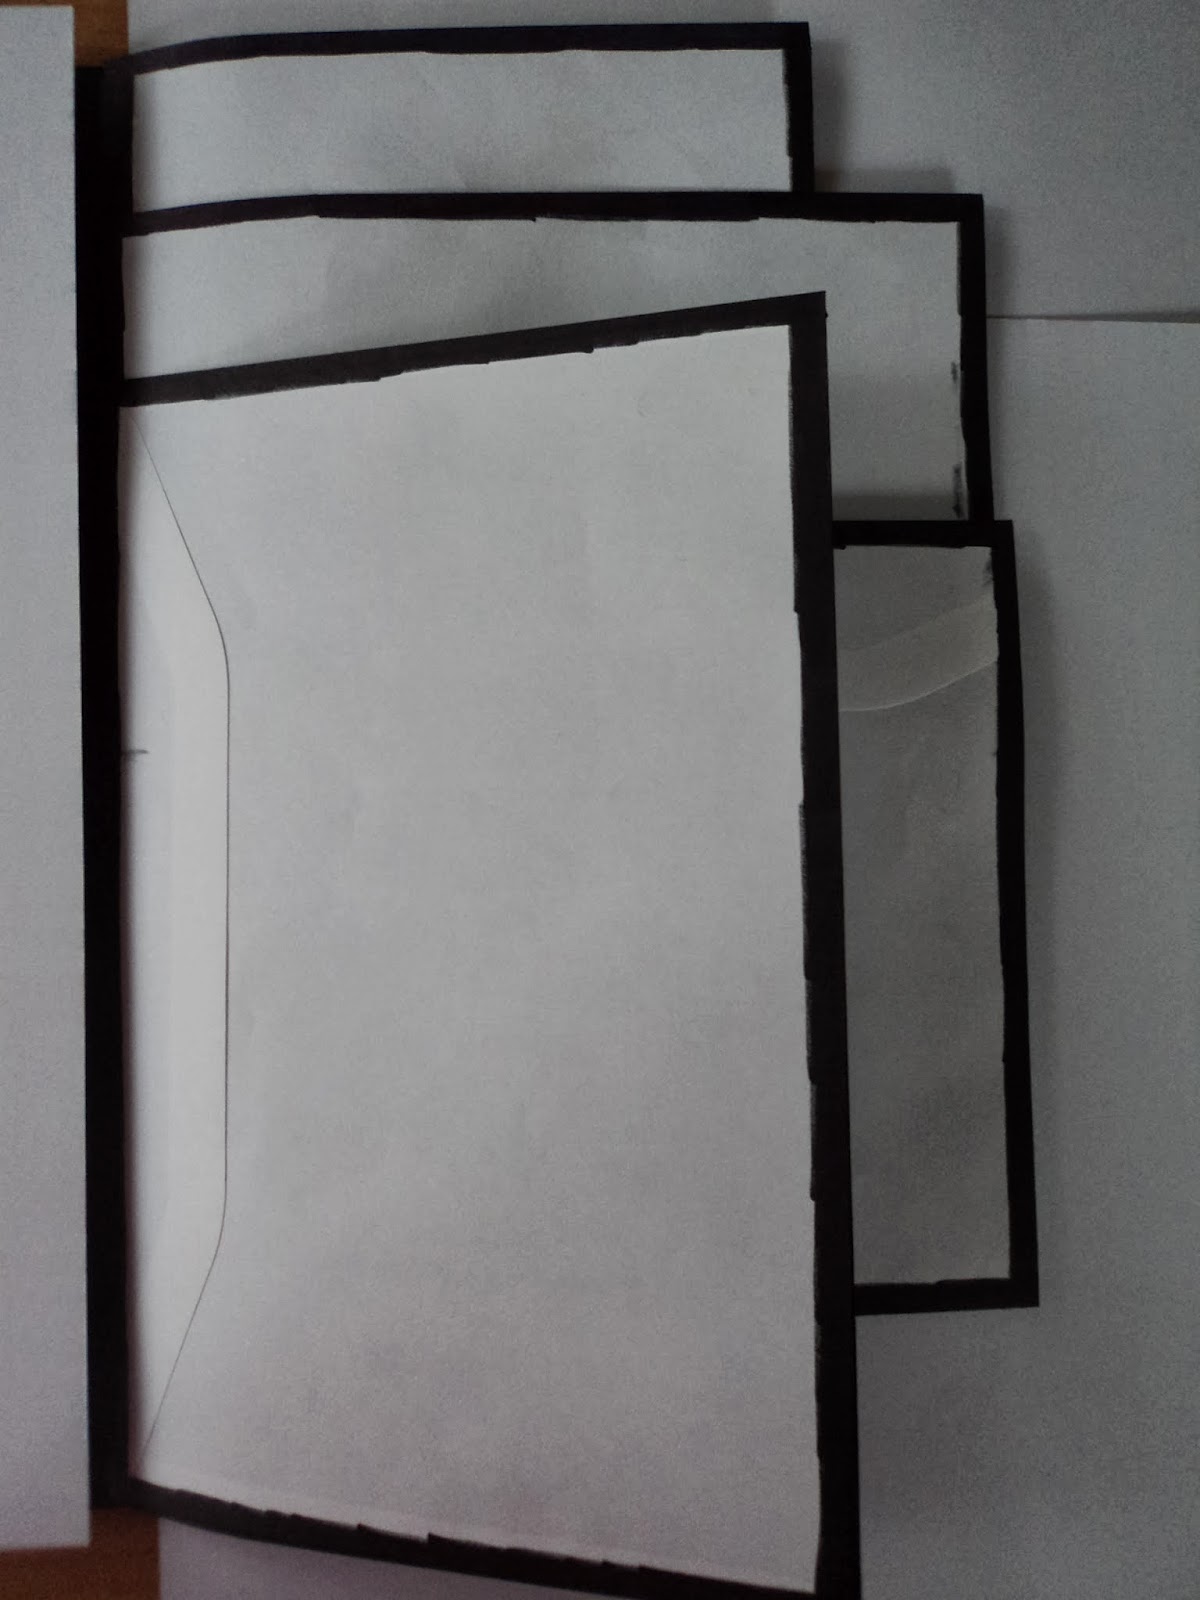
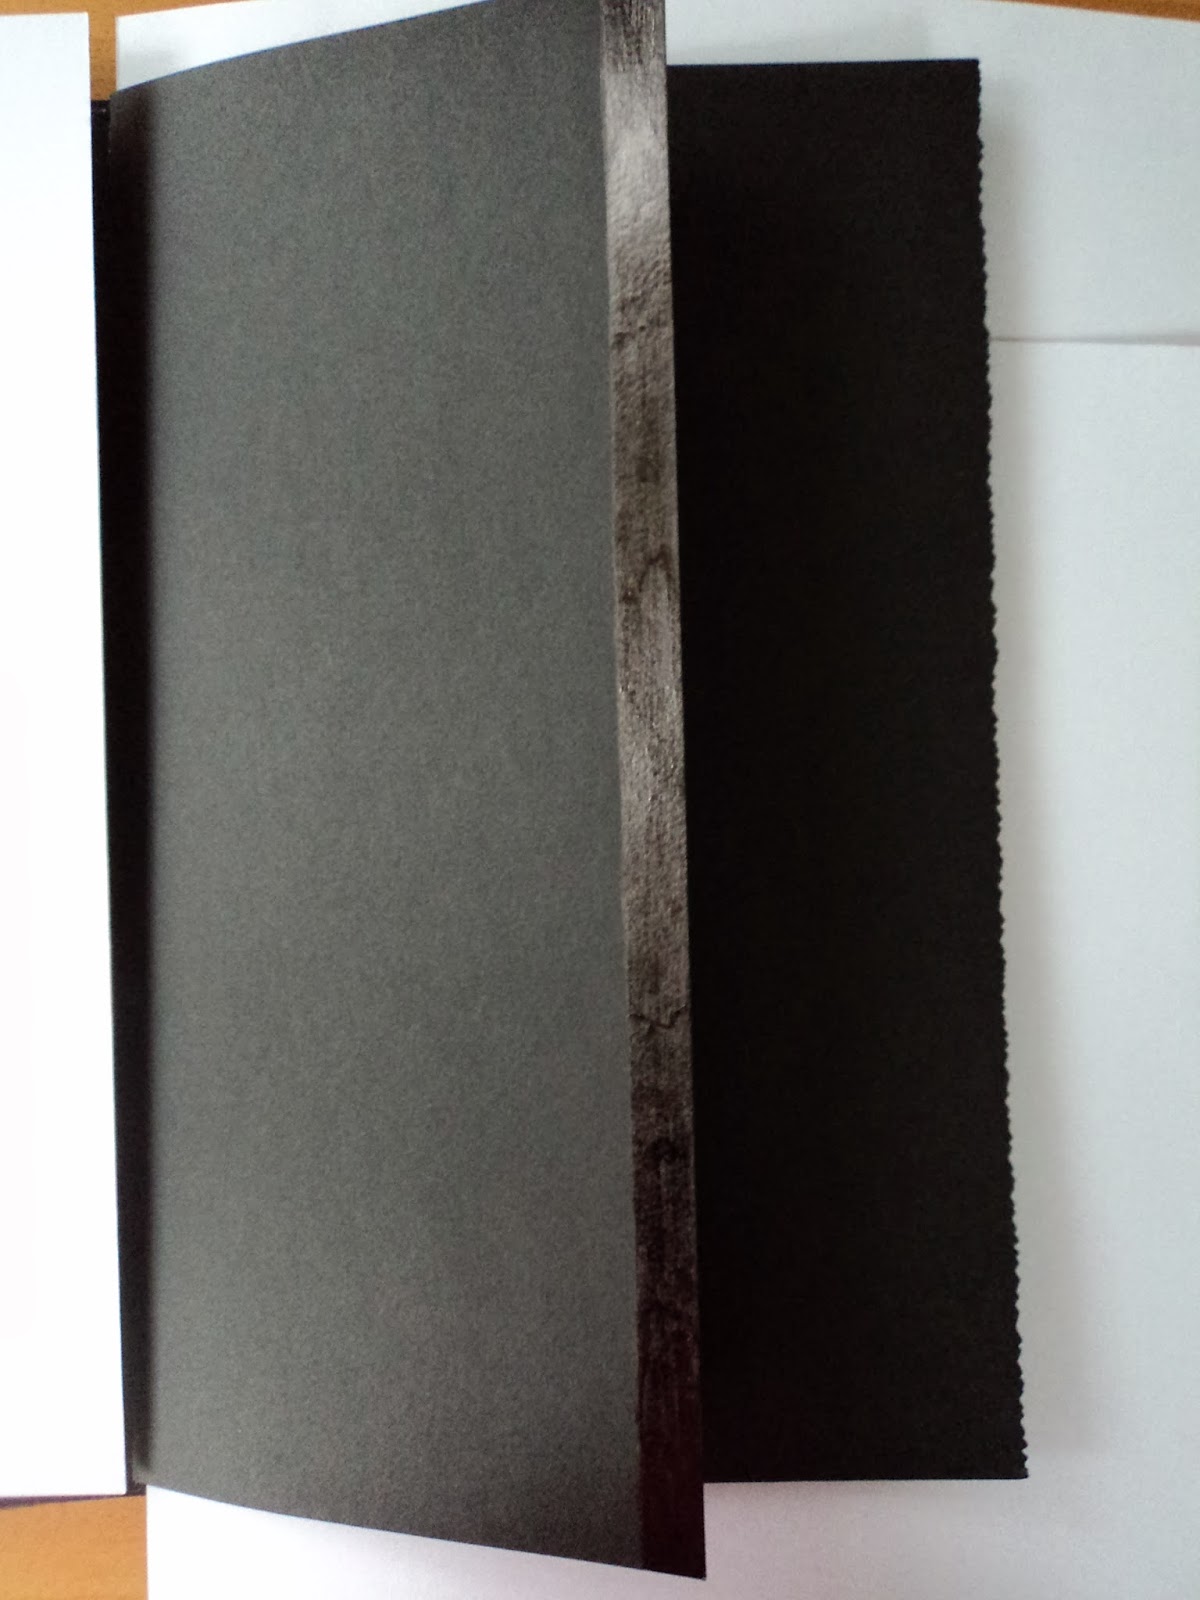
De tweede pagina bestaat uit 3 enveloppen waarvan de bovenste een extra flap aan de linkerkant heeft en de derde enveloppe heeft een extra flap aan de bovenkant. Zo ziet het eruit nu alles met het stippen of strepen papier beplakt is.

The second page of the album is made of 3 envelopes. The first one has an extra flap on the left side and the last one has an extra flap at the top of the envelop. After I glued on the paper with the stripes or the dots is looks like this.


vrijdag 21 februari 2014

Blue Log Cabin Quilt (35)

Na het naaien van de laatste blokken voor deze quilt is het tijd om alles uit te leggen en te kijken hoe alles aan elkaar gezet moet worden. Ik heb diverse blokken moeten ruilen om tot een goede verdeling van de kleuren te komen maar volgens mij is het aardig gelukt. Ook het aan elkaar zetten van de blokken gebeurt volgens het logcabin patroon van binnen  uit. Mijn patroon is afkomstig uit het boek Glorious Patchwork van Kaffe Fassett met Liza Prior Lucy. De eerste quilt die ik volgens dit patroon heb gemaakt was 140 cm hoog en 130 cm breed. Deze blauwe uitvoering moest iets kleiner worden en daarom heb ik besloten de laatste 2 stroken weg te laten. De nieuwe quilt zal daarom ongeveer 120 cm hoog worden en 100 cm breed. Het naaiwerk kan weer beginnen.

After sewing the last blocks of the quilt it was time to arrange all blocks and look for the right layout. I had to swap some blocks before the right color distribution was accomplished. Sewing the quiltblocks together follows the same guidelines as sewing the individual blocks. I will start with a centre block and the other blocks will be sewn around it. My pattern comes from the book Glorious Patchwork from Kaffe Fassett with Liza Prior Lucy.The first time I used this pattern the quilt was about 58 inch high and 54 inch width. This blue quilt needed to be a little smaller so I decided to drop the last 2 rows. This new blue quilt therefor will be about 50 inch high and 42 inch width. I can start sewing again.


het patroon / the pattern


het aangepaste patroon /  the adjusted pattern


mijn blokken layout /  my block arrangement

donderdag 20 februari 2014

Blue Log Cabin Quilt (34)

Het is eindelijk gelukt. De laatste 5 blokken zijn genaaid. Dit zijn ze. Nu moet alles nog aan elkaar gezet worden e.d. maar dat komt nog. Eerst maar eens kijken hoe het gaat worden. Morgen meer.

I finally managed to sew the last 5 quiltblocks. All blocks are sewn now. Look! Ofcourse the blocks still must be sewn together but not now. I have make a nice layout first. To be continued tomorrow.


woensdag 19 februari 2014

Blue Log Cabin Quilt (33)

Ook voor vandaag stonden er weer 4 blokken op het programma maar die hebben iets meer tijd gekost dan gisteren. Deze keer moesten de stofstroken nog uitgezocht en op maat gesneden worden. Maar het is ook vandaag weer gelukt om de 4 blokken te naaien. Dit zijn ze geworden.

I had planned to sew 4 more blocks for the quilt today. This time I needed a little more time because I had to sort out and cut the stripes I wanted to use first. But I did sew my 4 blocks today. This is the result.


dinsdag 18 februari 2014

Blue Log Cabin Quilt (32)

De 4 blokken die voor vandaag op het programma stonden konden redelijk snel genaaid worden. Ik had nog wat restanten van stroken van grotere en eerdere blokken die bruikbaar waren en de naaimachine stond nog op tafel. Zie hier het resultaat.

The plan for today was sewing 4 blocks again. This time the sewing was very quick because I could use some leftover stripes from larger blocks I sewed before and my sewing machine was still standing on the table. This is the result of today's work.


maandag 17 februari 2014

Blue Log Cabin Quilt (31)

Zoals ik vorige week al heb aangekondigd is het nu weer tijd voor iets anders. Ik heb mijn mini album aan de kant gelegd en heb mijn blauwe logcabin quilt weer opgezocht. Zoals altijd wegen de laatste loodjes het zwaarst maar het eind komt in zicht. Vandaag heb ik weer 4 blokken gemaakt van 10 cm in het vierkant. In het totaal moeten er nu nog 13 blokken van dit formaat genaaid worden en dat wil ik eigenlijk deze week afronden. Onvoorziene omstandigheden natuurlijk daargelaten. Dit zijn de blokken van vandaag.

Last week I told you that I wanted to do something different this week. That is why my mini album is put away and my blue logcabin quilt showed up again. The last part of a project is always the hardest part but it has to be done. Today I sew 4 more blocks of 4 inch square. To finish the quilt there are 13 more of these blocks to do and I have planned to do that this week. These are the blocks of today.


vrijdag 14 februari 2014

mini album stippen en strepen./ mini album dots and stripes (7)

Omdat ik een mini album in mijn hoofd had met veel extra's heb ik een ruime afstand aangehouden tussen de pagina's. Dat betekent natuurlijk ook dat ik nu tijdens het afwerken die extra's moet toevoegen. Ik weet niet altijd goed hoe ik die extra's moet benoemen maar op de foto's zijn ze duidelijk te zien. Vandaag heb ik de voorkant van de eerste pagina afgerond.

When I started to make this mini album I wanted it to be very interactive. To make all these extra possibilities work I needed to leave some extra space between the pages. Now I started decoration the album I have to add all the interactive extra's. I don't know how to name all these things in the proper way but you can see them on the pictures.This is what the frontside of the first pages looks like now.


donderdag 13 februari 2014

mini album stippen en strepen / mini album dots and stripes (6)

Misschien dat het wat eentonig wordt maar ik ben nog steeds met het mini album bezig. waarschijnlijk zal ik volgende week wel wat andere dingen tussendoor doen maar nu nog niet. Na het maken van de basis pagina's is het nu tijd om ook het binnenwerk van wat kleur te voorzien. Ik ben bij het begin begonnen, namelijk de binnenkant van de kaft. Na de eerst laag papier heb ik alsnog besloten om er een opbergvak op te maken en in dat opbergvak zit nog een extra omslag voor een aantal foto's of kaarten. Kijk dat ziet er toch een stuk vrolijker uit.

Maybe you get bored about this mini album already but I still like to work on it. I will do some other things probably next week but for now I stay with my album. Now I have finished the basic pages in black cardstock it is time to bring in some more color. I started were I should, at the inside of the front cover. When I glued down the first layer of design paper I decided to make an extra pocket and an extra insert for that pocket. On the insert is plenty of space for some extra photo's or postcards. Look how bright these colors are.


woensdag 12 februari 2014

mini album stippen en strepen / mini album dots and stripes (5)

In het totaal komen er in dit album 6 basis pagina's dus vandaag heb ik de laatste 3 gemaakt. Pagina 4 bestaat weer uit een aantal gerecyclede enveloppen. Pagina 5 is een dubbele pagina met aan de voorkant een extra flap links en aan de achterkant een opbergvak. De laatste pagina is een grote zelf gevouwen enveloppe. Ook met deze pagina's is nog van alles mogelijk aan extra's maar dat komt pas bij de afwerking. Ook de beide kaft delen krijgen naast het gekleurde papier nog wel wat andere toevoegingen maar die verzin ik pas wanneer ik met dat deel van het album bezig ben.

The album has 6 pages so today I made the last 3 of them. Page 4 is made of 4 recycled envelops. Page 5 is a dubble page with a flap at the front side left and a pocket at the back. The last page is a huge envelop that I made myself of black cardstock. I also have to find some extra's for the front and the back cover but I will think about that when I work on that part of the album again.


dinsdag 11 februari 2014

mini album stippen en strepen / mini album dots and stripes (4)

Nu de kaft van een kleurtje is voorzien is het tijd voor de pagina's. Ik heb eerst alleen de basis pagina's gemaakt van zwart karton en overgebleven enveloppen. Pas als ik het gekleurde papier erop ga plakken zal de definitieve pagina indeling duidelijk worden. Aanpassingen en extra's zijn tot dan mogelijk. Vandaag heb ik de eerst 3 pagina's gemaakt. De eerste is dubbele pagina met één uitklapbare flap aan de voorkant. de tweede pagina bestaat uit 3 enveloppen waarvan 2 met een extra flap en de derde pagina is weer e
en dubbele met een extra flap.

I  have put the design paper on the cover so now it is time to make the pages. At first I only made the basic pages of black cardstock and some recycled envelops. When I'm glueing on the design paper I will decide about all extra's on the pages. Until than almost every thing is possible. Today I made 3 pages. The first page is a dubble page with an extra flap at the right front side. The second one is made of 3 envelops of which 2 have an extra flap. The third page is like the first but this time the flap is on the left side of the front,


maandag 10 februari 2014

mini album stippen en strepen / mini album dots and stripes (3)

Hoewel het album nog niet eerder zo genoemd is, is dit al de derde post over het album met stippen en strepen. Ik heb de titelpagina van het papierpakket al laten zien en vandaag heb ik de buitenkant van de kaft versierd met dit papier. Ik ben erg blij dat ik dit papier gevonden heb omdat ik tot nu toe niet veel papier kon vinden met wat fellere kleuren en eenvoudige patronen. Als sluiting heb ik gekozen voor een onzichtbare magneet sluiting.

In earlier posts this album hadn't a name yet but in this third post I have named it dots and stripes because of the paper I have used. I have showed you the title page of the paperpad in an earlier post. Today I have covered the outside of the album with the design paper. It wasn't easy to find some paper with bright colors and simple patterns. I uses an invisible magnet for the closure.


vrijdag 7 februari 2014

groot mini album / large mini album

Na het maken van de kaft heb ik besloten om het geheel zwart te verven zodat ik het papier er straks op kan plakken in plaats van het er om heen te moeten plakken. De verbinding tussen de verschillende kaft onderdelen is gemaakt van tyvek. Tyvek is een dunne kunststof die wordt gebruikt voor stevige enveloppen maar ook bijvoorbeeld voor wegwerpoveralls. Het ziet er uit als papier maar scheurt niet. Ik had toevallig nog een envelop liggen die ik heb verknipt voor het maken van deze kaft. Na de kaft heb ik het scharnier gemaakt waarop straks de pagina's worden bevestigd.

After making the cover I decided to paint ik black. This way I can glue the paper onto the cover and I don't have to cover the edges. I used 2 pieces of tyvek to connect the different parts of the cover. Tyvek in a synthetic material that looks like paper but it is very strong and it is difficult to tear but can easily be cut with scissors or a knife. It is often used for envelopes but also for disposable overalls. I used a received envelop for making this album cover. The second step for this album was making the hinge on which my pages will be
attached.

de kaft / the cover

het scharnier / the hinge

het scharnier in de kaft / the hinge attached to the cover

donderdag 6 februari 2014

nieuw mini album / new mini album

Naast alle andere dingen die nog liggen te wachten ben ik toch weer begonnen aan een nieuw mini album. Deze keer wil ik er één maken die wat groter is (20 bij 30 cm) omdat ik het wil gebruiken als verzamel album voor een aantal ansichtkaarten. Door mijn deelname aan postcrossing (zie www.postcrossing.com) heb ik een groot aantal ansichtkaarten verzameld en een aantal daarvan wil ik gesorteerd op thema in dit album opbergen. Omdat ik de kaarten niet wil beschadigen heb ik een wat groter album nodig. Ik ben begonnen met het maken van de kaft en ik heb het te gebruiken papier al uitgezocht.

Although I have a huge stash of onfinished objects I started a new mini album. This time I will make a large one (8 by 12 inches) because I want to use it for some postcards instead of photo's.  I'm a member of postcrossing (www.postcrossing.com) for some years now and I collected lots of beautiful postcards. In  the new album I want to show some of my postcards.  I started the album by making the cover and choosing the papers.